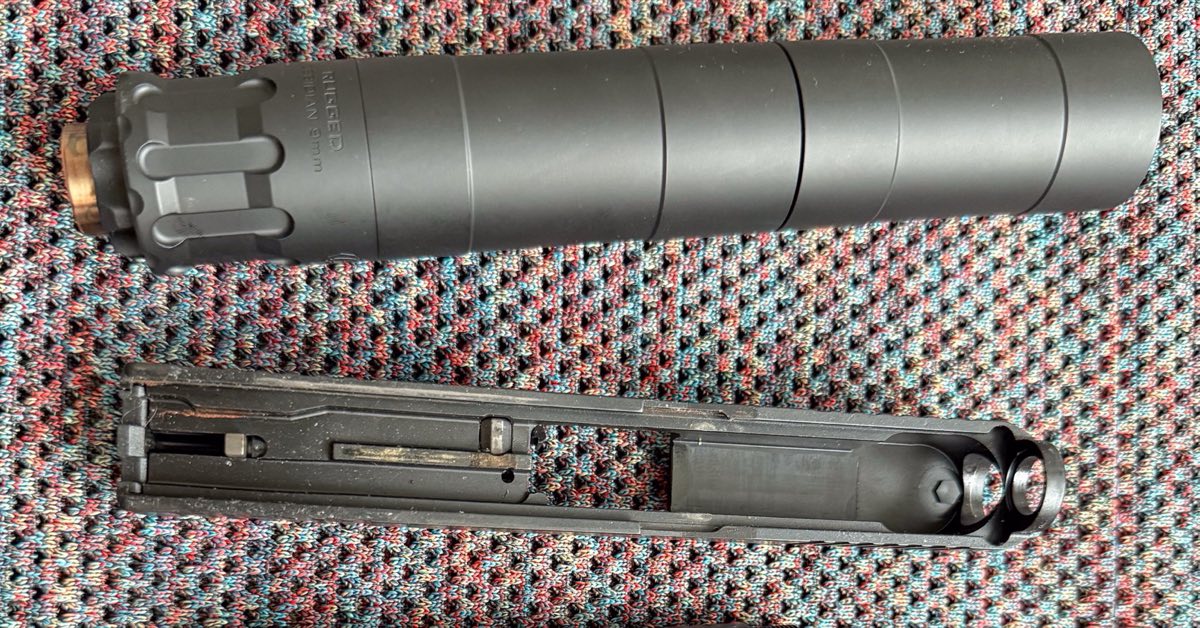
Photo: “Glock Firearm and Silencer” by Tony Webster, via Wikimedia Commons, licensed under CC BY 2.0. Cropped and resized from the original. The photograph shows third-party components and does not demonstrate Iron Saddle Armory product compatibility.

Suppressor ownership and applications have increased substantially. On July 10, NSSF reported that ATF data showed more than 845,000 suppressor applications submitted from January through May 2026. ATF's public figures also listed 6,439,813 silencers in the National Firearms Registration and Transfer Record as of June 8.
That means plenty of shooters are learning a useful lesson: adding a suppressor changes more than the volume. It adds weight at the muzzle, introduces another mounting interface, can affect cycling, changes the cleaning schedule, and can reveal clearance problems between parts that appeared compatible on a product page.
Here is what deserves attention before a compact 9mm setup goes to the range.
Start with the operating system, not the shopping cart
Many compact centerfire pistols use a short-recoil system in which the barrel and slide move together briefly before unlocking. Hanging a suppressor from that moving barrel adds mass and can interrupt the cycle. That is why many of these hosts use a spring-loaded piston assembly, often called a Nielsen device or booster. The piston must match the barrel's thread pitch, and the suppressor manufacturer must approve the complete combination. SilencerCo's piston overview explains why the assembly exists and why clearance and indexing vary by host.
A fixed-barrel platform is different. Do not assume the same spring-loaded setup belongs on both. The correct mount, piston, spacer, and configuration come from the host and suppressor manufacturers. Thread engagement alone does not establish compatibility.
Clearance is a three-dimensional problem
Thread pitch is only the first question. The suppressor and mount also need clearance from the slide, guide rod, chassis, frame, light, and any other nearby component through the firearm's full normal movement.
With the firearm completely unloaded and all ammunition removed from the work area:
- Confirm the barrel, mount, piston, and suppressor are approved for one another.
- Inspect the muzzle threads and indexing surface for dirt, burrs, or damage.
- Install components exactly as their manufacturers direct; do not force, file, grind, or “clearance” a part to make the combination fit.
- Check that the suppressor and mount do not contact the chassis, slide, guide rod, or accessories during normal manual cycling.
- Use only the manufacturer's approved alignment-check method, or have a qualified gunsmith verify alignment.
- Complete the host manufacturer's unloaded function check before live fire. For an RXM-based setup, begin with the current Ruger RXM instruction manual.
If anything touches, drags, binds, or refuses to return fully to battery, stop. A “very small amount of interference” is still interference and can become more serious during use.
Treat the first range session as an inspection
Follow the host and suppressor manufacturers' live-fire test procedures at a properly managed range. Pay attention to changes in cycling, ejection, return to battery, point of impact, and mounting tightness. Stop immediately for an unusual sound, visible contact, a loosened mount, damaged threads, abnormal impact, or any new malfunction.
Suppressors get hot quickly. Let the system cool before touching, tightening, removing, or inspecting it, and use only the heat-handling procedure and protective equipment specified by the manufacturer. Do not substitute an ordinary shop rag for manufacturer-specified protective equipment.
Some pistol suppressors can loosen during use. Check mounting tightness at the intervals required by the suppressor maker, with the firearm unloaded and the suppressor cool enough to handle safely. Never improvise an O-ring, tape, adhesive, thread locker, or washer unless that exact method is approved for that exact system.
Maintenance belongs to the whole system
Carbon and fouling can collect on suppressor parts, pistons, springs, threads, and mating surfaces, turning a reliable setup into a troubleshooting exercise.
SilencerCo's maintenance guidance distinguishes between sealed and user-serviceable suppressors and emphasizes following the specific manual. That matters: a solvent, brush, ultrasonic cleaner, or lubricant that is appropriate for one material may damage another.
After use, and at the interval specified by the manufacturers:
- Inspect and clean barrel threads, piston parts, springs, mounts, and mating surfaces.
- Use only approved solvents, brushes, lubricants, and disassembly steps.
- Check for unusual wear, damaged threads, cracked parts, loose components, or stubborn deposits.
- Keep residue and solvents off skin, wear eye protection and suitable gloves, and wash hands after cleaning.
- Record what changed when troubleshooting: ammunition, mount, piston, lubricant, or host. That way, you do not replace five variables and learn nothing.
Do not disassemble a sealed suppressor or put an unknown alloy into an ultrasonic cleaner based on unverified advice. Confirm the approved procedure in the product manual or with the manufacturer.
Quieter does not mean hearing-safe
A suppressor is an effective noise-control tool, but it does not eliminate the need for hearing protection. A CDC/NIOSH-reviewed study found that suppressed firearms can still present a significant hearing risk and concluded that users should continue wearing hearing protection.
Keep using appropriate eye and hearing protection, follow range rules, and treat the suppressor as one layer in a responsible setup.
The useful bottom line
A suppressor-ready compact 9mm setup is a system: host, barrel, mount, piston or spacer, suppressor, chassis, ammunition, and maintenance routine. Reliability comes from verifying each interface in the complete configuration.
Before changing an RXM-based configuration, review the Nomad Installation and Safety Guide and the Ruger manual. For fit questions involving an Iron Saddle Armory product, contact the builders with clear photos of the fit or alignment area, but do not send firearm serial numbers or other sensitive personal information.
Always verify current federal, state, and local requirements before acquiring, possessing, transporting, or using a suppressor. This article is general educational information, not legal advice.